STAR-GAZING Guide to Creating Your Own Mineral Moon.
Download a pdf of these instructions by clicking here.
If you find this guide useful, please let me know.
More guides can be found on my Web site:
www.Star-Gazing.co.uk
I run a series of hands-on astrophotography workshops throughout the year.
For more details of these see my Web page:
www.star-gazing.co.uk/Workshops.html
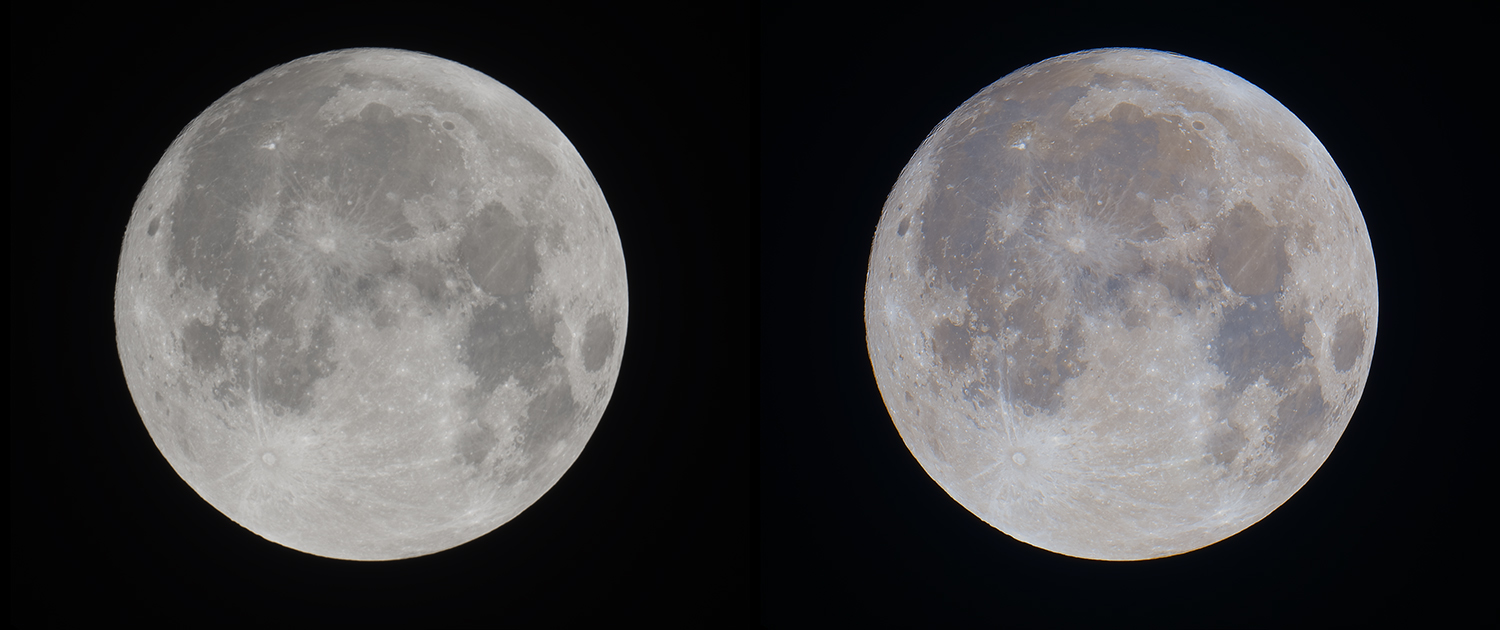
We’ve all seen images of the Moon. Most of the time, they look quite bland and flat.
However, there are some extremely subtle colour differences in the lunar surface soil, which even as an amateur can be revealed.
Subtle brown colours and in the case of Mare Tranquillitatis (the mare that contained the landing site of Apollo 11) blue coloured soil. The blue colour is caused by higher levels of titanium in the soil.
These soil colours are extremely subtle and need to be gently teased out of lunar images.
So how do you change a bland looking image from this, to this?
Taking your image.
What sort of lunar image will you need to create your mineral Moon?
Any image will do. Be it a DSLR, Bridge camera or even a mobile phone. Note that mobile phones usually save images as jpg files. These compress data, so the quality is never going to be anywhere near as good as a more advanced camera. The biggest stipulation is that the image scale will need to be big enough to see the features clearly. To do this you will need a relatively long telephoto lens or a telescope to take the image.
If using a more advanced camera, save all the images in RAW format. Once transferred to the computer, unless your image processing software can handle raw files, use whatever image processing software you have to change the image format to a TIF file. These file formats do not compress the data, so more can be tweaked out of your image.
When taking your image, a DSLR shakes when the shutter is opened. This is caused by the mirror flipping out of the light path. It can take a few seconds for these vibrations to subside. The last thing you want is to do is to take the image while the camera is shaking. This will blur the resulting image.
To avoid this problem, set the camera to use the Mirror-Up function. One click raises the mirror. A second click once the vibrations have died down takes the image.
I also find it best to use an intervalometer attached to the camera. This allows you to take the images without touching the camera. An infra-red device is also useful if your camera is compatible.
Activating the shutter this way, without touching the camera also reduces the amount of vibration produced when taking the image.
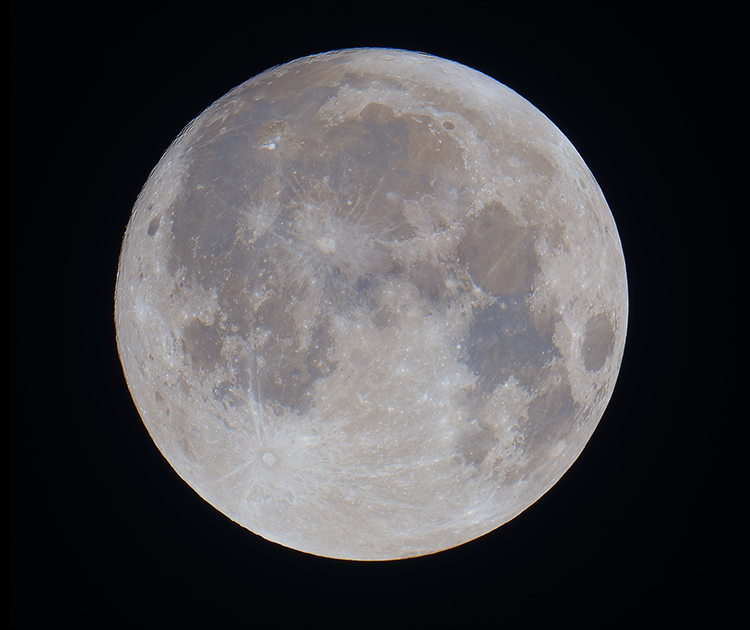
The image below of the nearly full Moon was taken with DSLR. Single image.

This image can be downloaded from my Web site:
www.star-gazing.co.uk/Downloads/Moon.tif
If you want to take your own image to work on, here is my general rule of thumb:
The exposure used for the image will depend on the phase of the Moon. Use as low an ISO as your camera allows. Usually 100 ISO. The lower the ISO, the less noise produced in the image.
If the Moon is close to full, the Moon will be brighter, hence the exposure will need to be shorter. Look at the histogram on the camera as each image is being taken. It should look something like that below.
The twin peak shows the brighter pixels of the exposed Moon. This peak should be about halfway along the histogram, similar to that shown below.
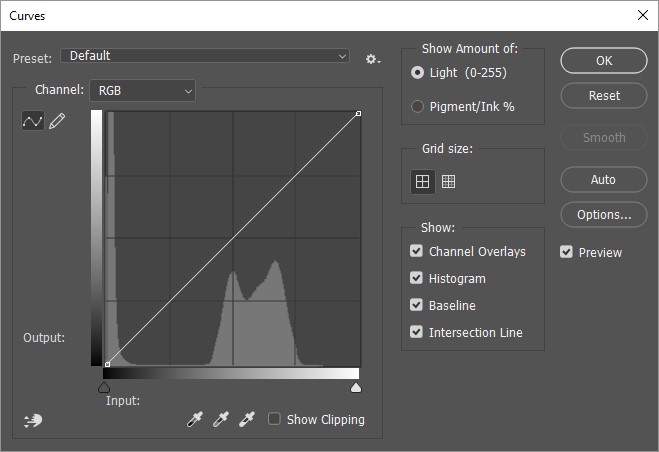
The aim is to not get any part of the Moon over-exposed. Keeping the exposure as short as possible helps to do this. Most cameras come with a preview that flashes if revealing any overexposed pixels, so it may also be worthwhile switching to that view to help you set the camera to get the best exposure.
Once happy with the exposure, take a number of images. Some will be taken when the atmosphere is really disturbed, some when the atmosphere is more settled. As a result, some images will be sharper than others.
When all the images have been captured, transfer the images to the computer and check them on the big screen. Delete any images that are blurred. Pick the sharpest image to work on.
Image Processing.
Once you have selected the sharpest image, import it into Photoshop. This would preferably be a raw image, depending on your version of the software, or convert to TIF first. JPG’s can be bought in directly, but as mentioned before the image quality will suffer due to the file compression.
Despite lots of care, this image isn’t quite as sharp as I would like.
So let’s fix that first.
From the Menu, go to Filter, Sharpen, Smart Sharpen.
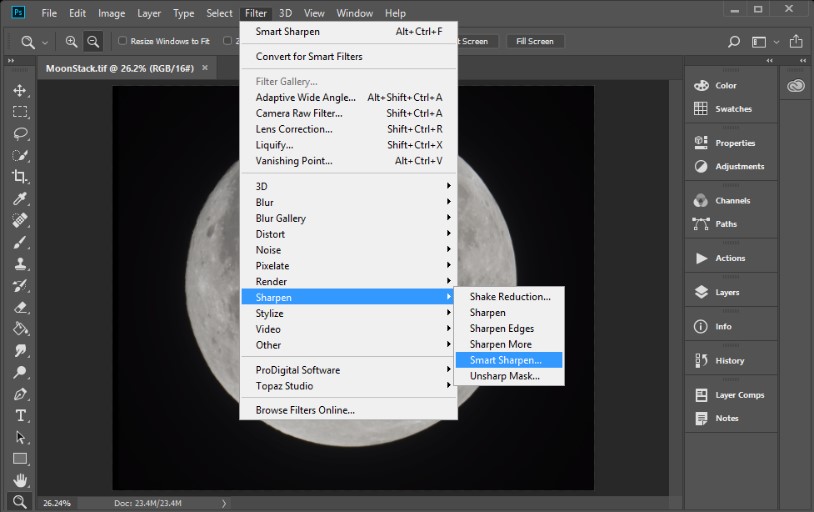
Move the Amount and Radius to the right to sharpen the image.
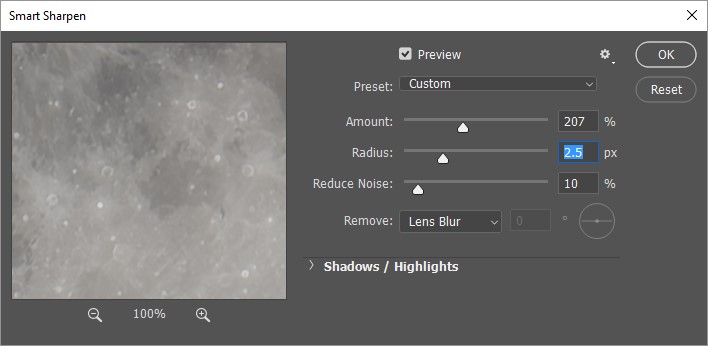
Amount always goes a bit further right than Radius.
The distance you move these sliders will depend on the quality of your image.
Be extremely careful, it is very easy to overdo this step and sharpen the image way too much.
When you are happy with the amount of sharpening, click OK.
Now the image has been sharpened, now to reveal those subtle soil colours.
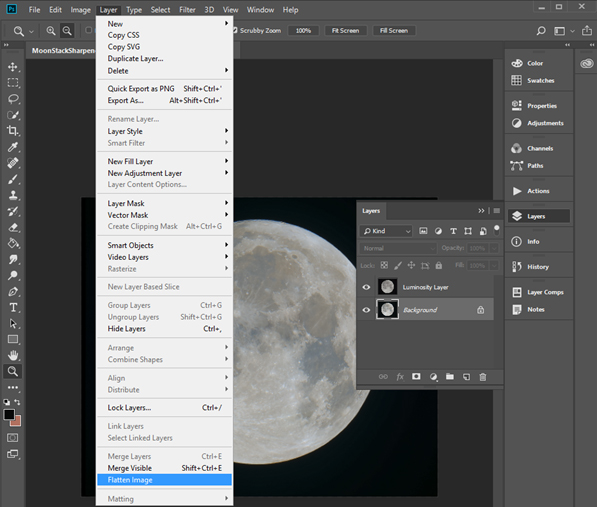
From the Menu select Layer, Duplicate Layer.
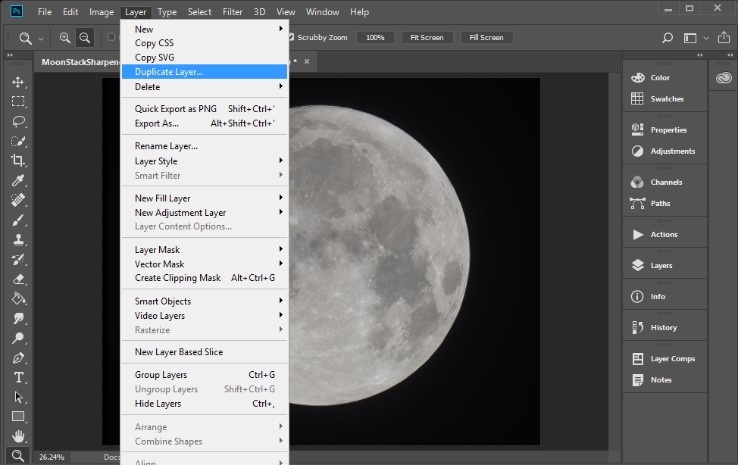
Re-name the new Layer Luminosity Layer, as this is what it will become.
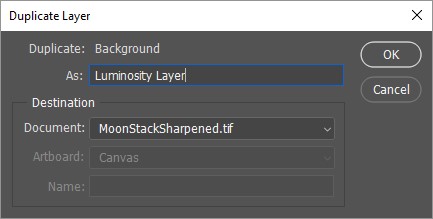
Click OK.
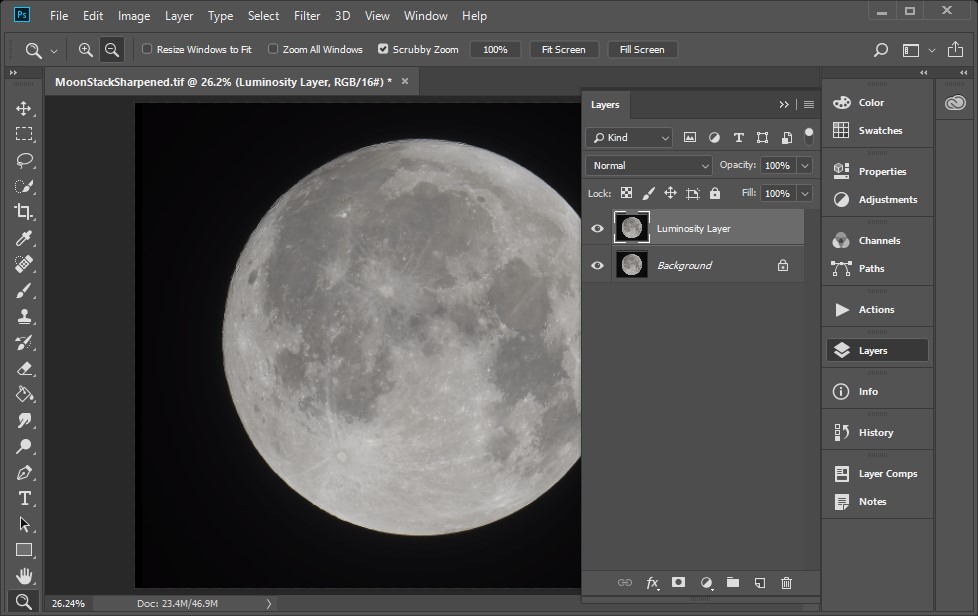
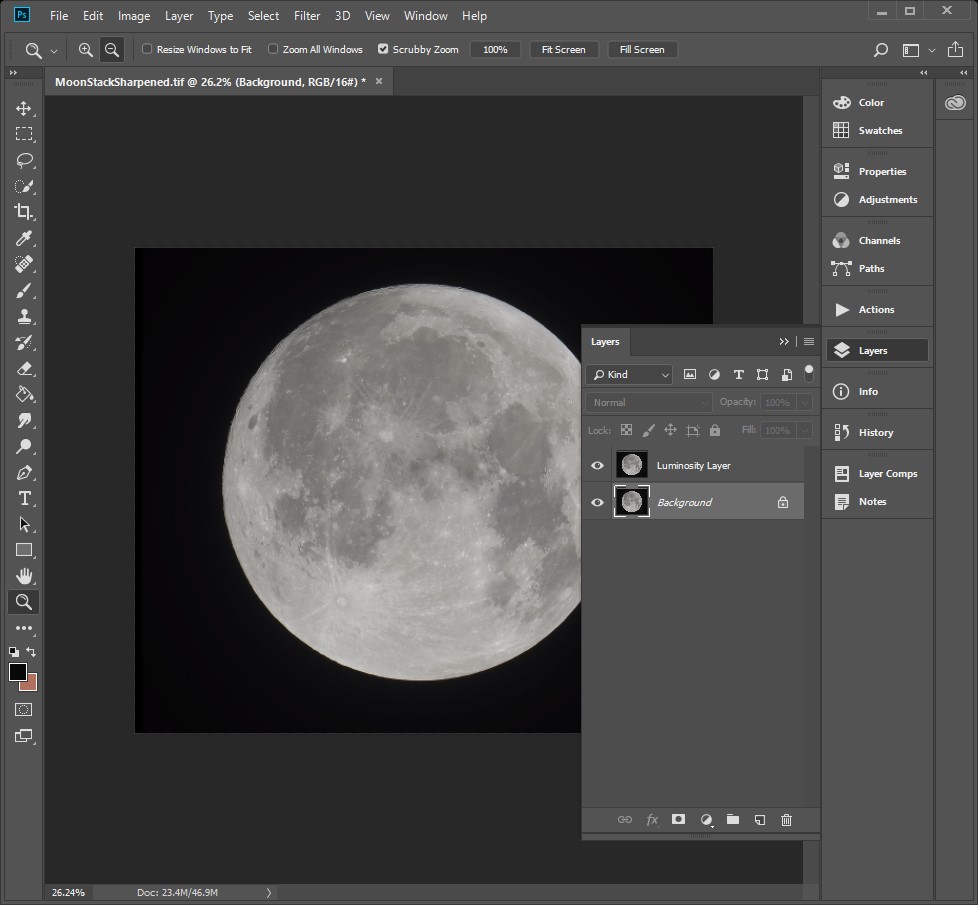
From the Menu, make sure that Window, Layers is ticked to reveal the Layers Window.
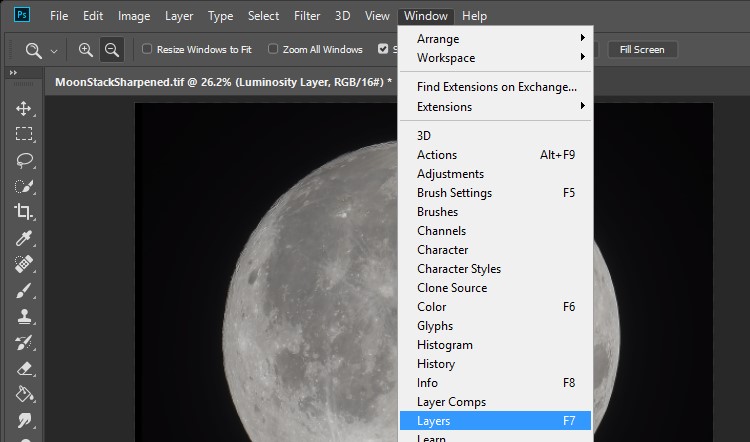
This Layers menu should now be visible on the right-hand side of Photoshop.

Click on Layers to reveal the two layers.
Keeping the newly created upper Luminosity Layer selected, from the drop-down menu that currently shows as Normal, select Luminosity from the bottom of the selection menu.
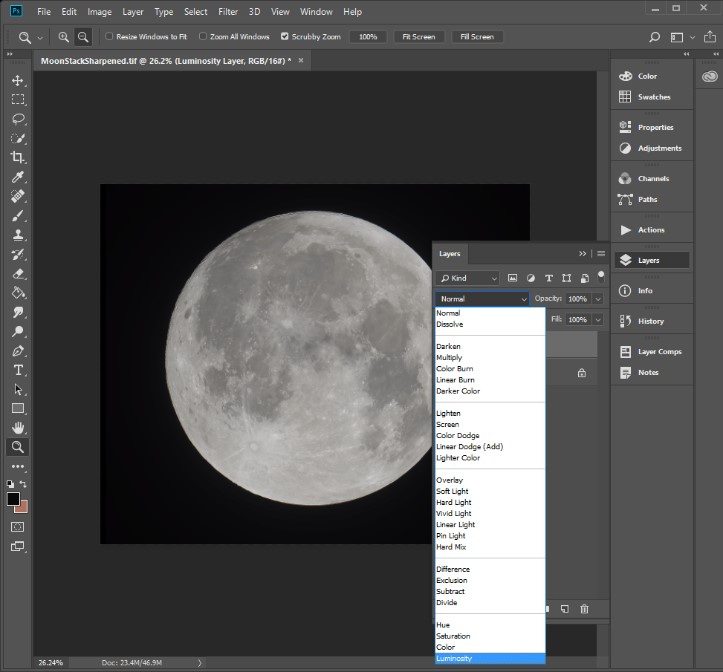
This action will lock the pixels in the image so that the brightness of any pixel does not change. This will help retain detail in the image as changes are made to the lower layer.
Once the upper layer has been changed to a luminosity layer, click on the lower layer to select it.
Now we will play with the saturation settings.
First the colour balance needs to be set.
From the menu, click Image, Auto Color.
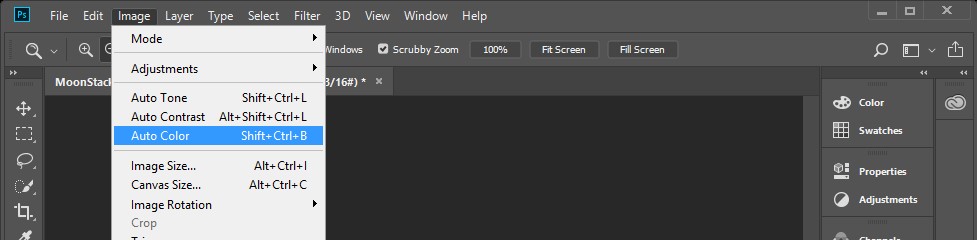
Not a lot of change will be noticed in your image.
Now we’ll start to play with the saturation to reveal the colours.
From the menu, go to Image, Adjustments, Hue/Saturation.
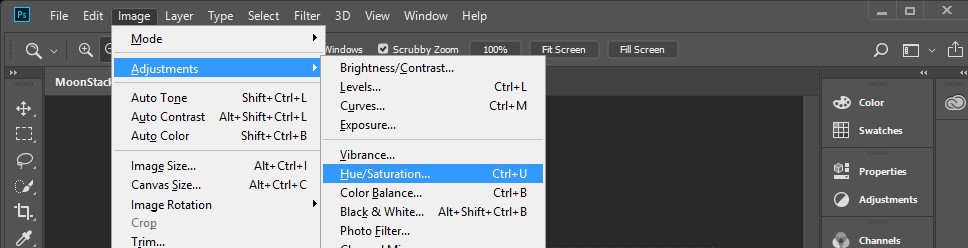
Adjust Saturation in the middle to about +50 (no more than this). Then click OK.
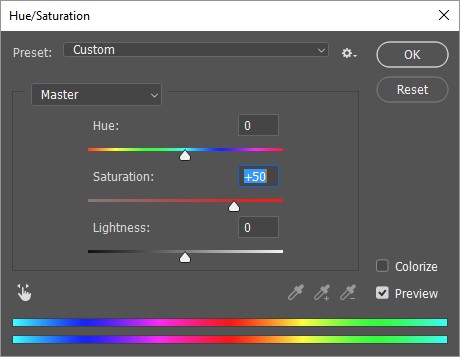
You may see an increase in colour, but not very much.
Repeat increasing the saturation several times using this same increase, or a bit less, until the colour is revealed.
It is much better to increase the saturation in many small gradual steps, rather than fewer bigger steps.
The more saturation increasing steps made, the more colour will become visible in the image. But once again, don’t overdo things.
Once happy with the colour balance achieved it’s time to flatten the image.
From the menu go to Layer, Flatten Image.
Save the image with a different file name.
This will make sure that you do not overwrite your original file.
If you have found this guide useful, please let me know.
More guides can be found on my Web site:
I run a series of hands-on astrophotography workshops throughout the year.
For more details of these see my Web page: