Imaging is always seen as a bit of a black art.
There are those that seem to do it really easily, and those who really struggle with some of the concepts.
It can be a very steep learning curve, so during my workshops and in my guides, I always try and explain these as fully as possible.
This helps get folks over that seemingly huge hump and well on their way to producing some great images.
When taking images, you will see that it is always good practise to take calibration frames.
These can be used to improve images and include Dark Frames, Flat Fields, BIAS frames etc.
I am not going to try and describe them all here, but the two most important ones that take a bit of getting your head around are Dark Frames and Flat Fields.
Using both of these can really help to make an image sparkle.
BUT THEY ARE NOT ALL GOOD!
If they are not done properly, they can make an image worse than if they were not used.
So use them with caution.
If you are just starting out in astrophotography, do not get hung up about having to take and manage calibration frames.
Just get to grips with the basics first.
Only go onto doing these once you have become a lot more confident with imaging and processing.
I have found that when using a DSLR, I have managed to produce some great images WITHOUT using either.
In fact most of my DSLR Images are processed with no calibration frames.
CCD’s and CMOS cameras are a lot different to DSLR’s.
The way they are built and work, means that Dark frames and Flat Fields do become a lot more important when using them.
Artefacts show up a lot more easily when using these.
Let’s look at these two calibration frames in turn.
Dark Frames.
What is a Dark Frame?
When you take images, we are using the camera to expose a light sensitive chip to any incoming light, where it collects photons.
A pixel where starlight is focused onto it, lots of photons will be collected.
There will be quite a high signal and the pixel will become bright, close towards white.
Where there is dark sky, less photons will be collected.
In this case, the pixel signal will be low and its brightness will be closer to black.
All pixels across the imaging chip will receive a different amount of light.
So there will be pixels at all different levels somewhere between black and white.
These build up an image of the area of sky which is focused onto the surface of the cameras chip.
The longer that the camera is exposed, the more photons are collected by the pixels.
This will result in a brighter image.
That sounds all well and good. But the way that the camera works frequently plots against us.
Depending on the chip used in the camera, there is quite often some amp glow within the camera.
This can be seen as a brightening on the resulting image.
There may also be bright “Hot” pixels and dead dark ones.
These can create bright and dark speckles in the captured images.
These can all ruin our final stacked image if we did not get rid of them.
Here is a single sub taken of the Elephant Trunk Nebula.
This image is a 900 second long exposure using a monochrome ZWO ASI183MM Camera.
This is known as a light image (Or Sub-image if you are taking lots to stack later).
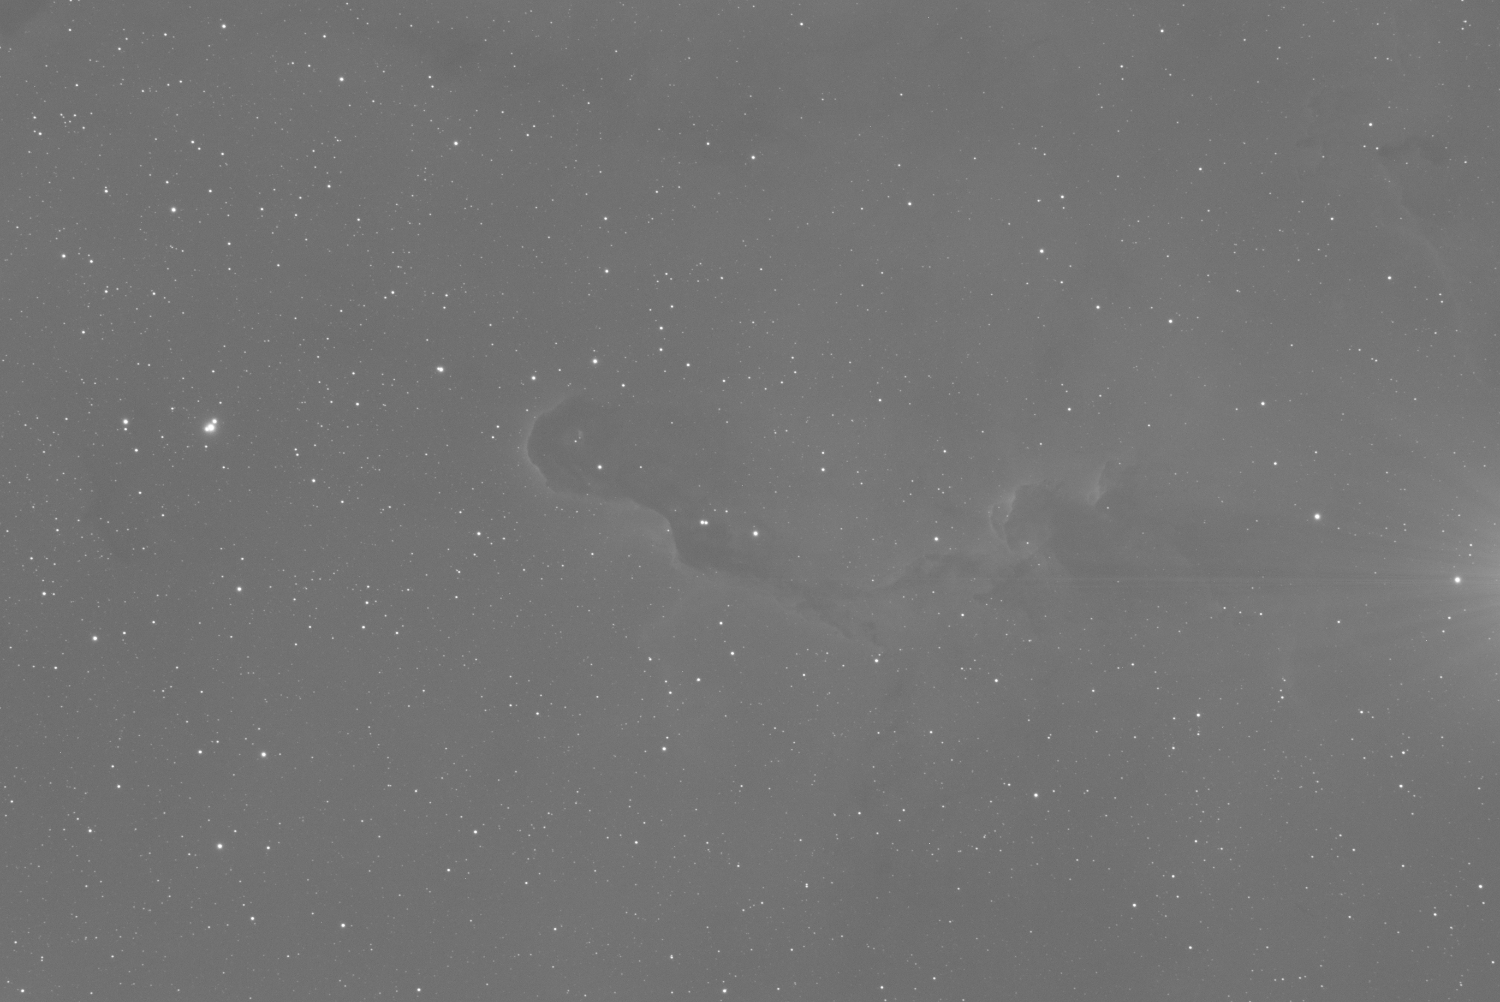
Look on the right-hand side of this image.
The chip used in this very popular camera produces a bright star shape coming in from middle of the right-hand side.
The longer the exposure taken, the brighter this artefact becomes.
Thankfully all these artefacts are extremely easy to remove in the stacking process.
All that is needed is to take some dark frames.
To do this, put the cap on the telescope to prevent any light getting in.
Then take a series of images at the same exposure and temperature that you are using to take the images.
This will result in an “almost” black image which only contains the hot and dead pixels and, in this camera’s case, that star shape produced by the chip.
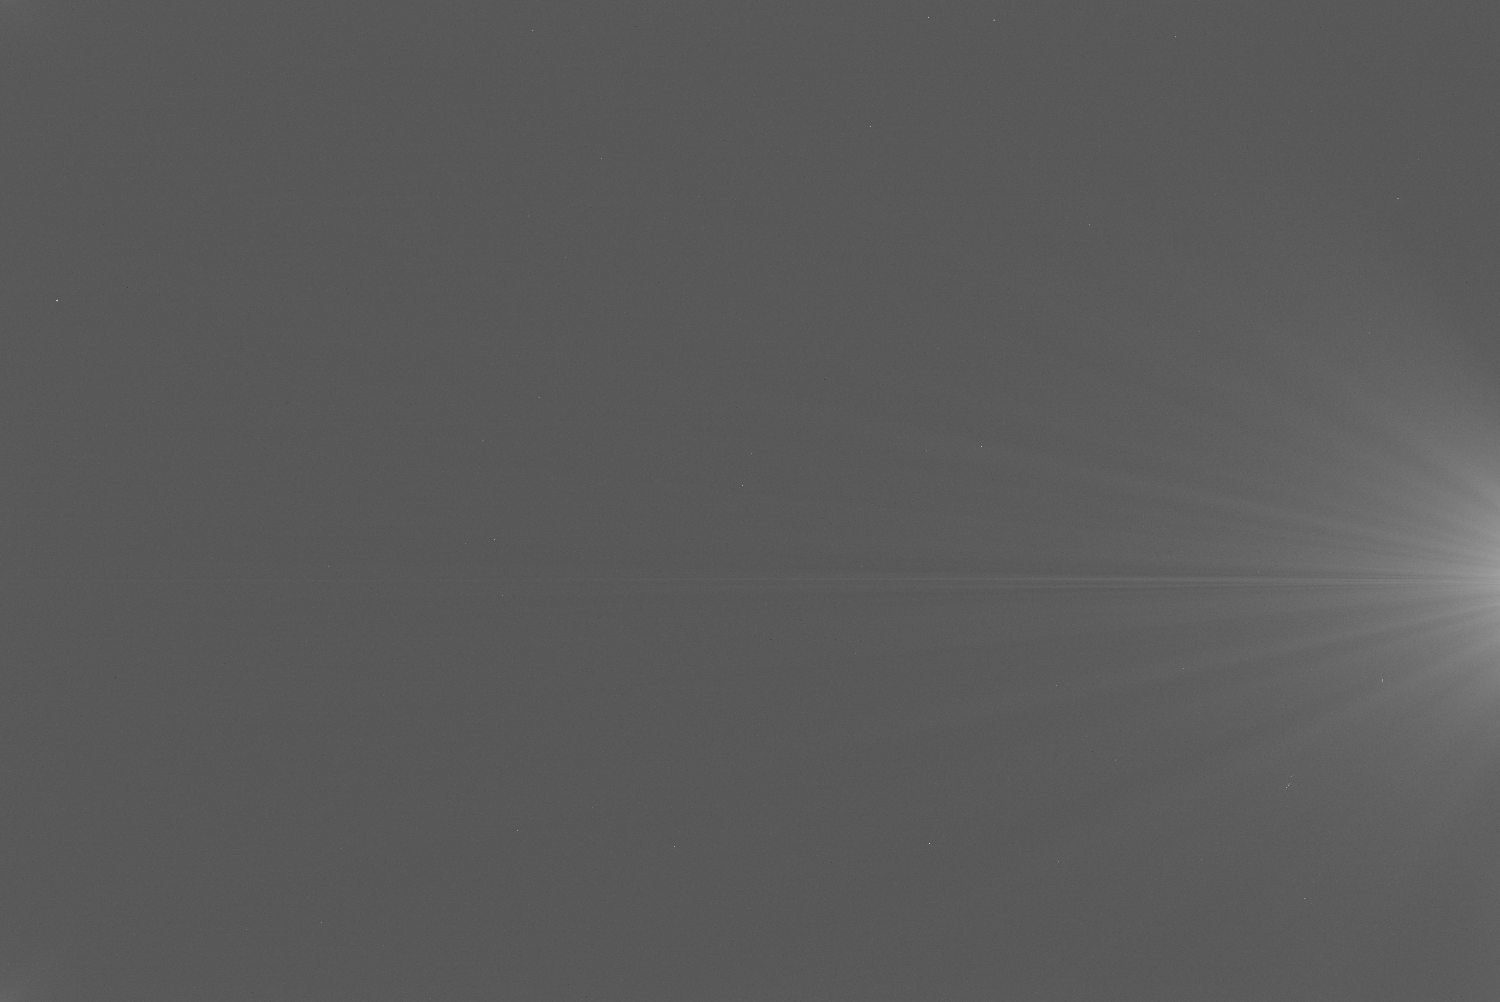
This is known as a dark frame.
It is always best to take a number of dark frames to apply to your stacked image.
These will be used later, so that you get an average dark frame image during the stacking process.
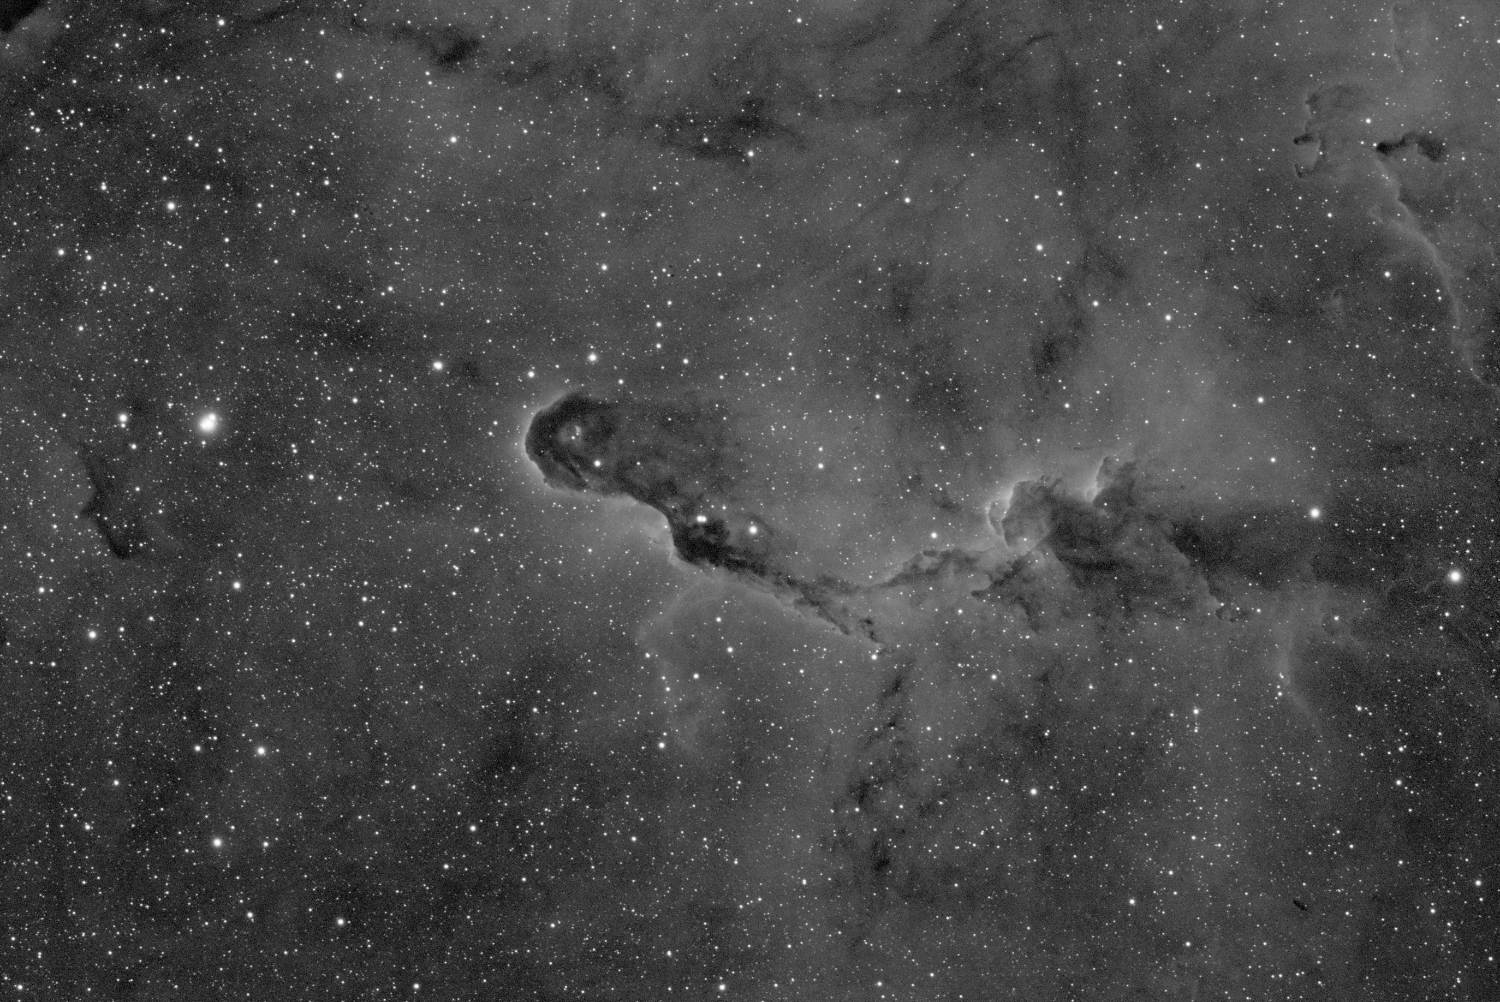
Once you have captured both your light images and the darks, everything is now ready for stacking.
In your stacking software, either Deep Sky Stacker, Affinity Photo, or other dedicated stacking software, you can load the light frames that need stacking.
Then select the dark frames that need to be used to remove the artefacts.
During the stacking process, the dark frames will be deducted from the light frames (subs).
So in this particular case, that star produced by the camera chip is effectively removed from the light subs.
As a result you will no longer be able to see the artefacts produced by the camera in the final stacked image.
An example of this can be seen below.
It is important to remember that the amount of amp glow, or noise in the resulting image will depend on the exposure used.
So any dark frames used for the stacking process MUST be taken at the same temperature and exposure as the captured light frames (subs).
If a longer exposure dark frame is used to stack shorter exposure images, there will be some over-correction and it will be too severe.
This can result in a reduction in brightness where the artefacts were.
An example of this can be seen below.
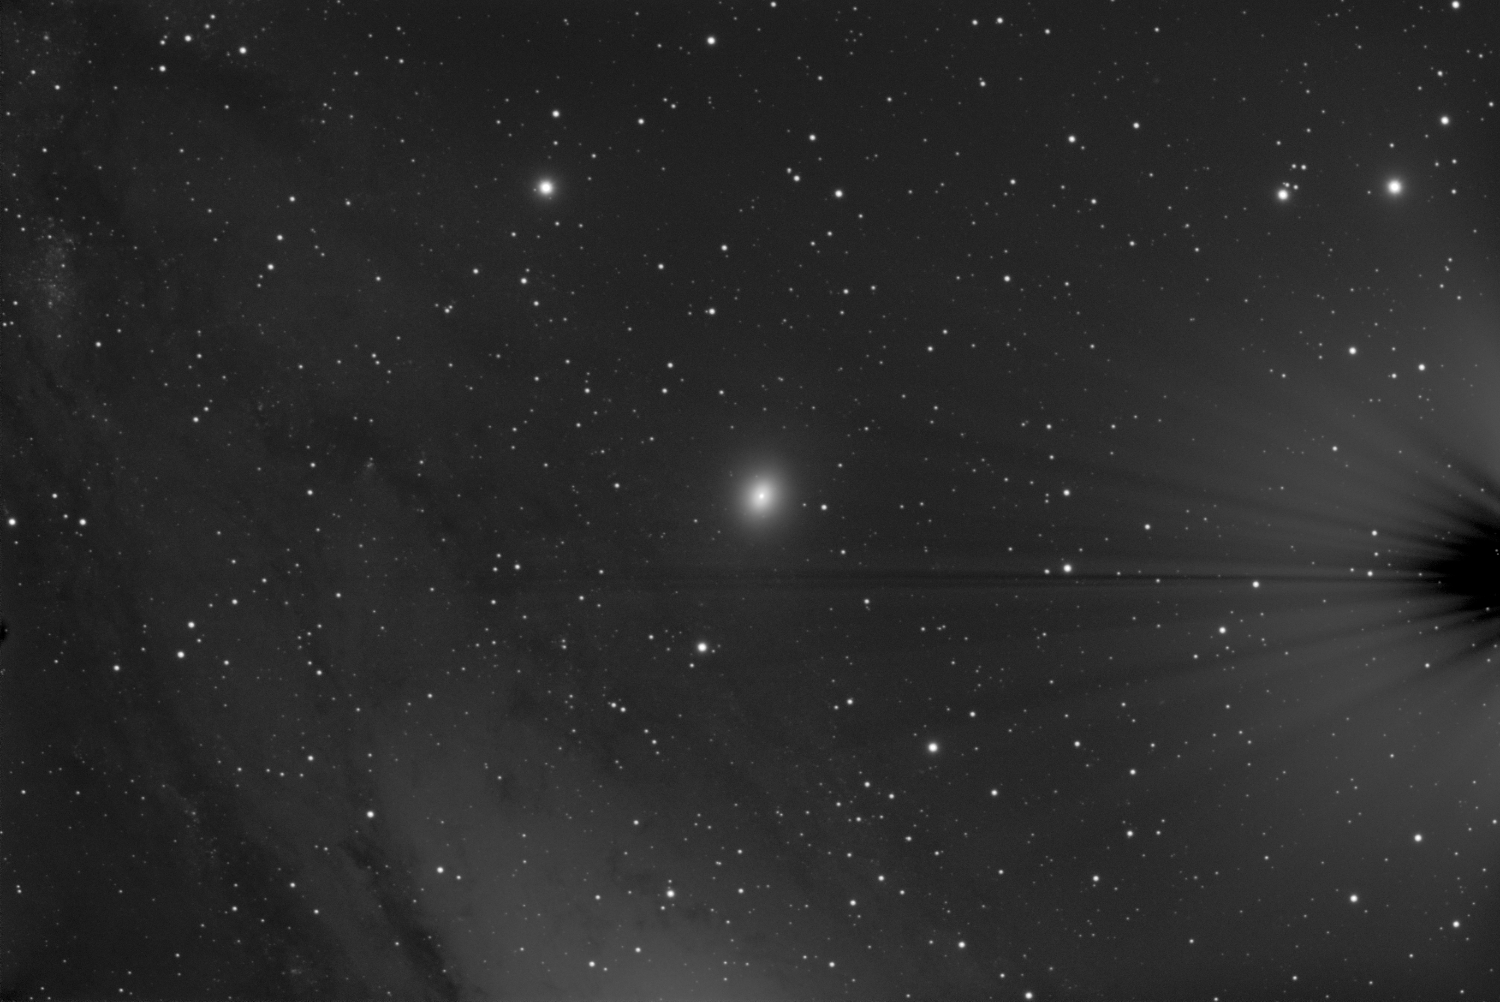
In this image of M110, I took 120 second exposures for my light subs.
I then used dark frames of 900 seconds and used those to correct my image.
The over-correction has resulted in the image now having a dark star shape that has been deducted from the image.
So always make sure that the exposures for your dark frames are taken with the same conditions as your subs.
So I hope that explains about dark frames.
What’s different about Flat Fields then?
Flat Fields.
When you are taking light images (Subs), there may be different parts of the imaging chip that are slightly less sensitive than others.
This can be caused by manufacturing errors in the chip, or shadows created by dust lying in front of the camera.
These latter shadows are known as “Dust Bunnies” and can be a real pain to get rid of.
There may also be some shadowing around the edges of the image, caused by the restricted field of view created by the scope used.
This is known as vignetting.
The image below is of the dark Seahorse Nebula in Cepheus.
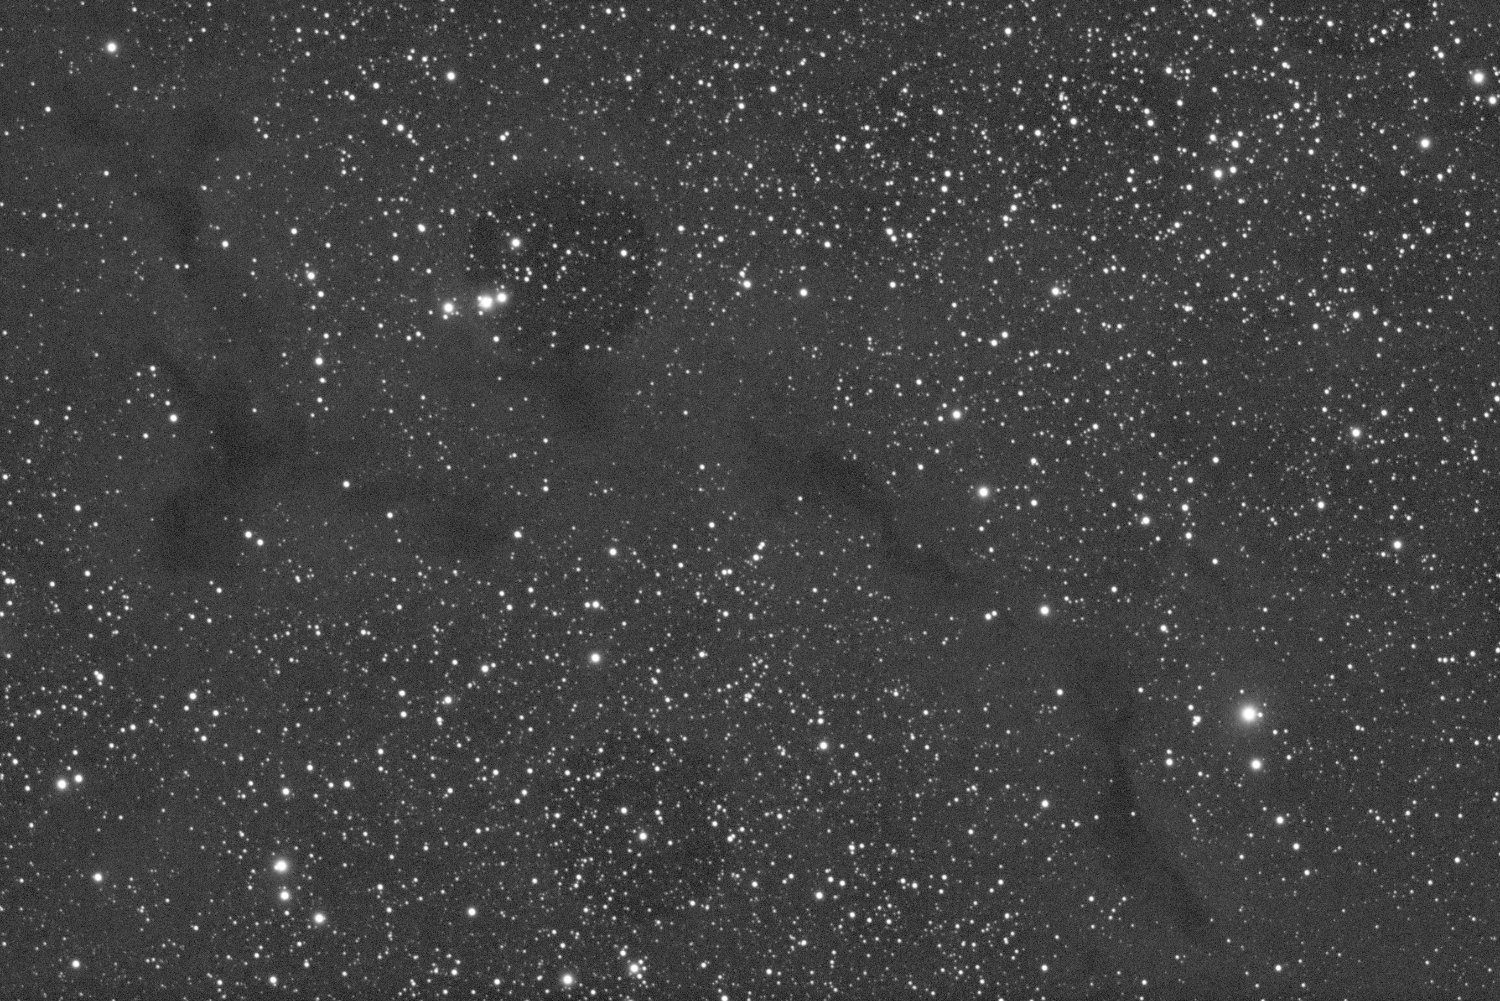
It has had the dark frames subtracted from it, which has removed the star and any hot pixels, but it is still showing some problems.
The dark nebula can be seen quite clearly, but there are also a couple of very large dust bunnies spoiling this image.
The most prominent one is towards the top of the image left of centre.
The other one towards the bottom of the image, just left of centre.
These can be removed by using flat field images when the subs are stacked.
A flat field is taken in almost the opposite way to the dark frames.
This is normally done in the daytime.
Here’s how I take mine.
Remove the cap off the end of the telescope.
Drape a white T-shirt over the end of the scope, making sure there are no creases that will create shadows.
Take an image that gives you an exposure so the highest peak of the image histogram is about a third of the way up.
A flat field image taken for my setup can be seen below.
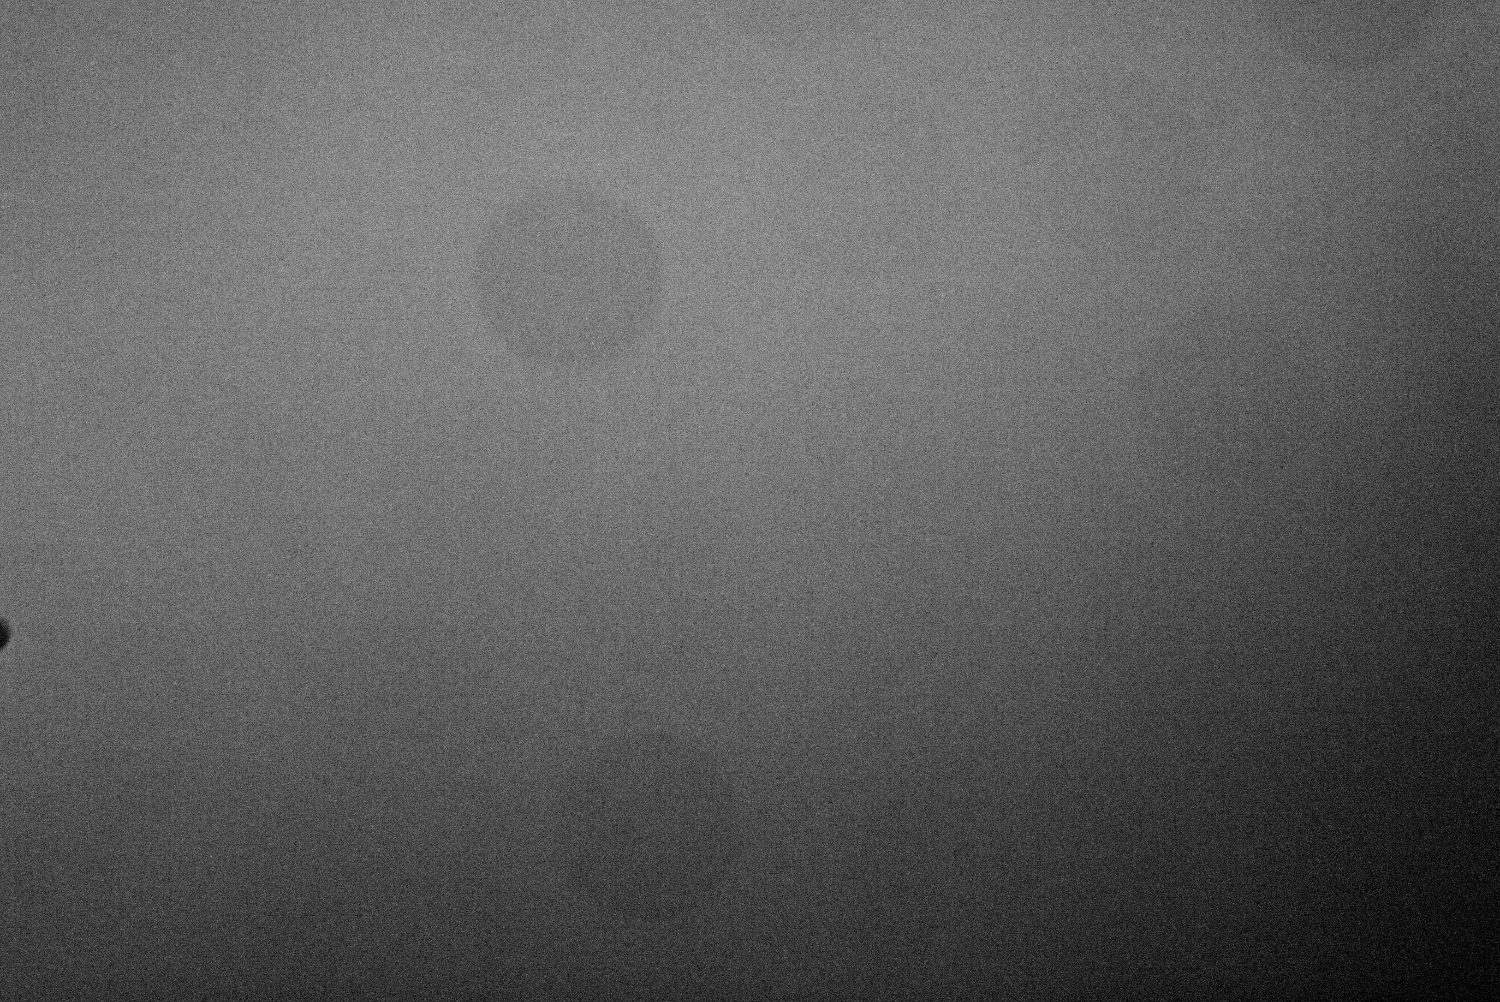
You can see there are a number of dust bunnies visible in the image, showing as dark circles.
These correspond to the positions of the shadows seen in the stacked image
The flat field image is also darker towards the bottom-right corner.
When the subs are stacked and the flat field calibration image is used, these shadows are removed to give a much better image as seen below.
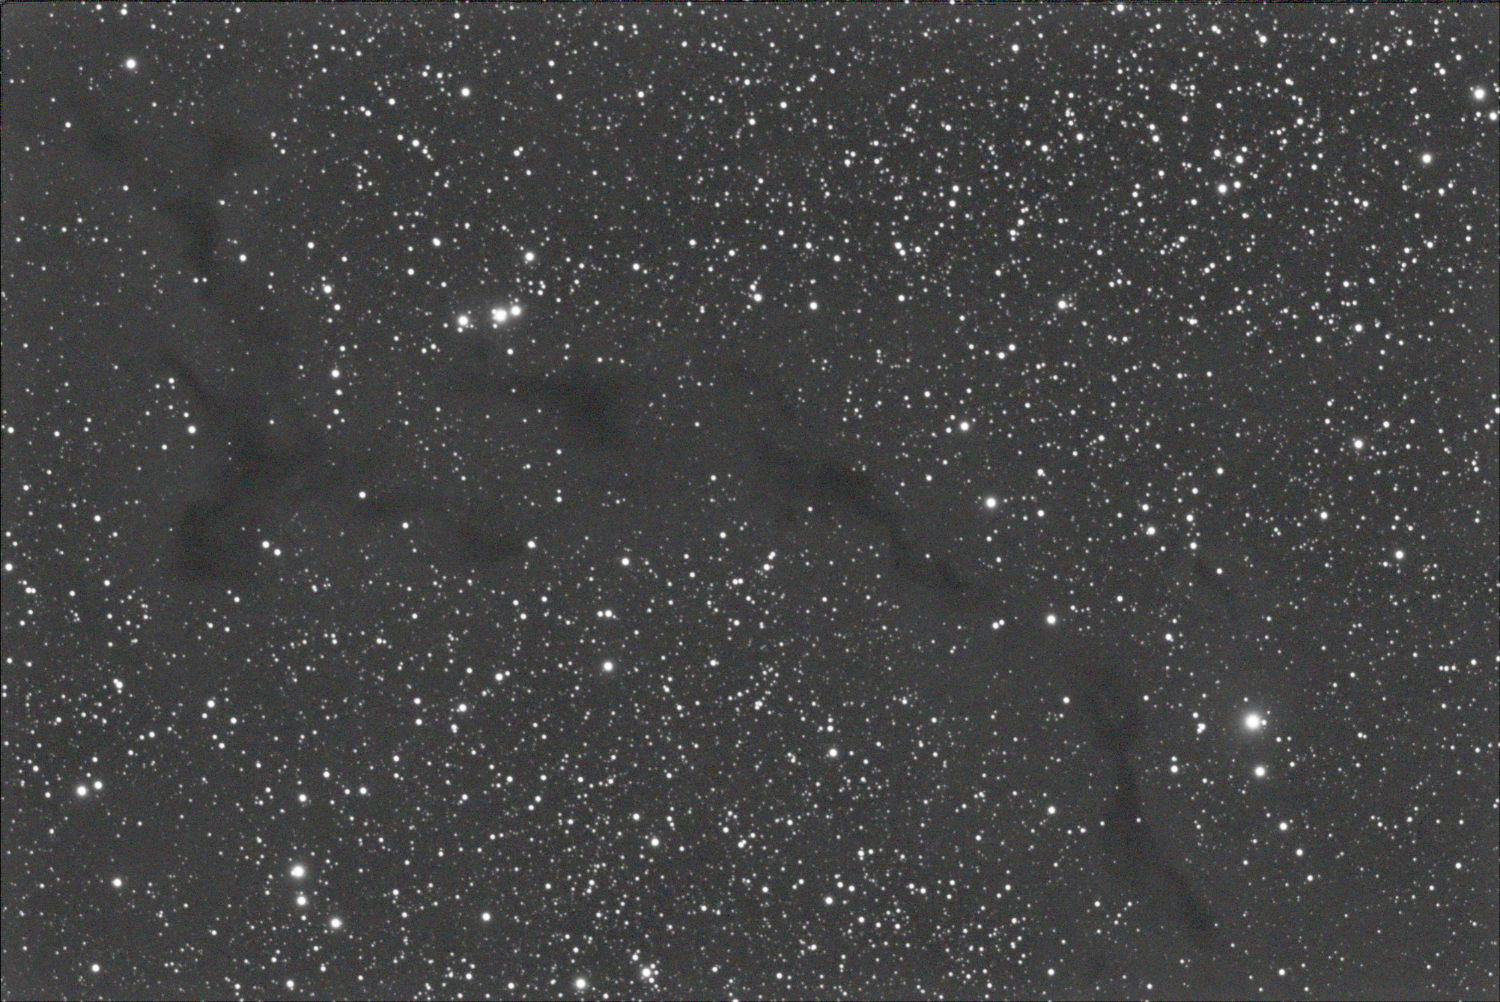
Now, all we can see is the dark Seahorse Nebula and a fairly flat background.
The flat field images that were applied in the stacking process has removed the artefacts we could see in the original image.
A combination of both dark frames and flat fields will clean up images very nicely.
This will get around many problems resulting from problems with the light sensitivity across the imaging chip and any shadowing created by dust in the light path or uneven illumination caused by the telescope setup.
So once you do get very familiar with the astrophotography image processing technique, don’t forget to use dark frames and flat fields when stacking. These will greatly improve the appearance of your images if done with care.